I recently bought a Swann DVR8-5580 with four 4k cameras, to replace my ageing CCTV system, which had a pretty poor quality picture. I’ve been very happy with the new setup in most respects, however the DVR unit does have one very annoying feature – the fan. It’s just too noisy!
I have my DVR unit located in my living room, next to my broadband router and TV. This makes connecting it to the router really easy (you need to use a network cable, as it has no WiFi capability) and also the connection to the TV is simple (the DVR comes with a HDMI out and a VGA out), however being in the living room makes the noise from the DVR unit really annoying!
I had a bit of a Google around and found several other people reporting the same issue, but no real fixes. So, I’ve taken the matter into my own hands and thought I’d report my findings here to hopefully be of use to other owners of the same system.
The Problem
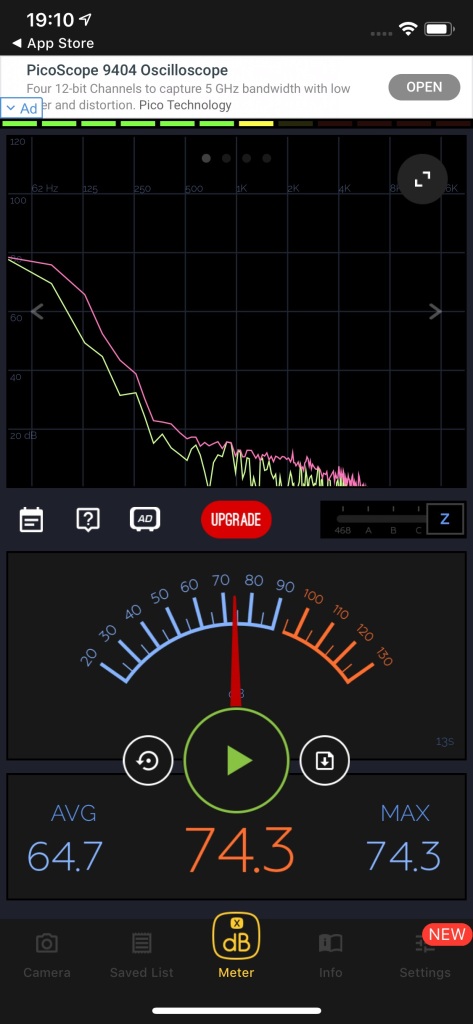
The issue with the DVR8-5580 is that it’s too noisy. To demonstrate how noisy, I used a free dB meter app on my phone, held next to the DVR unit to see how loud it was. Below is the result – 74.3dB. That doesn’t mean a lot on it’s own, but it gives me a benchmark to work against.
The Fix
I wasn’t sure at first whether the noise was coming from the fan, or the hard disk. After listening to it for a while, it became fairly obvious it was the fan, as it was a constant noise, which didn’t change with disk activity. Removing the lid from the unit showed a fairly poorly designed interior, in terms of cooling, with a single fan, measuring 40 x 40 x 10mm. It was very apparent upon opening the lid that the fan was the source of the noise.
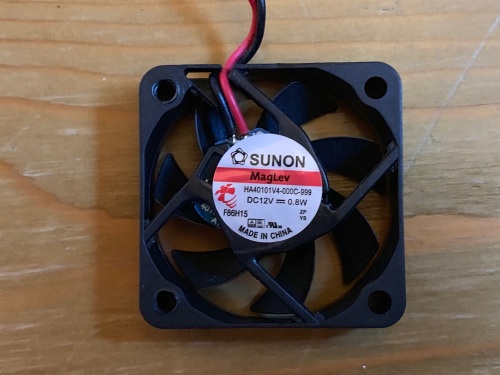
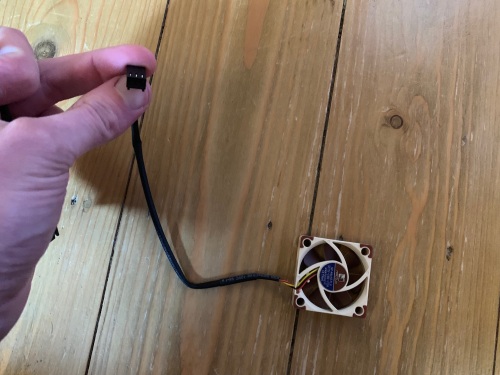
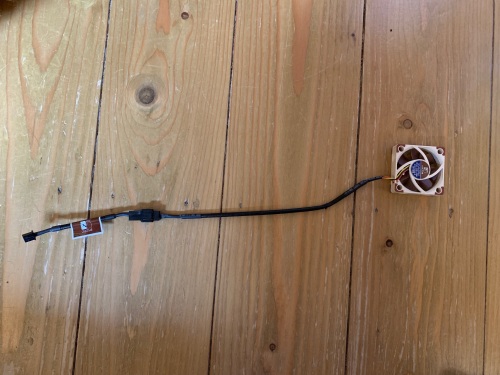
The original fan is made by Sunon and is a 12V 0.8W fan, with a 2-pin connector:
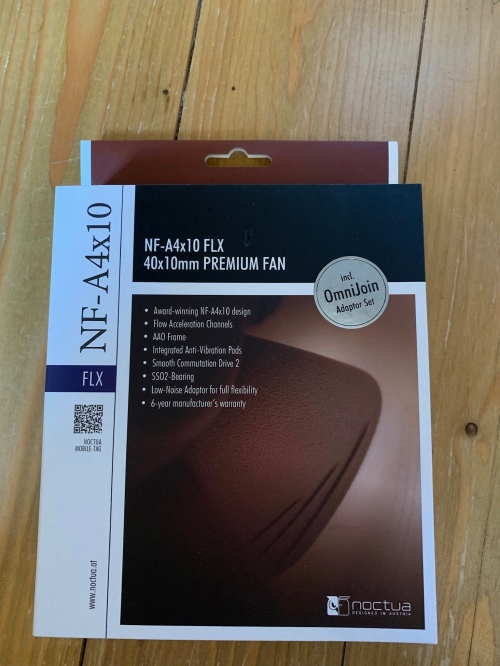
After doing some research, it turns out that 40 x 40 x 10mm is a pretty commonly available fan size for PCs. It’s good to have options. Of all the available fans, the brand that consistently got good reviews was Noctua, so that’s what I went for. They’re available on Amazon for £11.11 at time of writing:
Aside from the new fan, you’ll need the following in order to replace the fan in your DVR:
- A cross-head screwdriver
- A drill
- A 5mm HSS drill bit
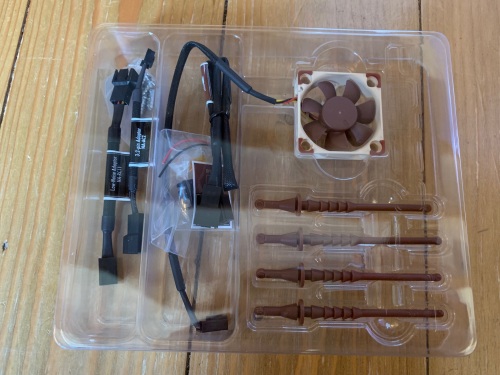
The fan comes with a 3-pin connector, which won’t fit the 2-pin connector on the Swann DVR’s main PCB.
The Noctua how does however come with a number of adapters in the box, one of which converts it to a 2-pin.
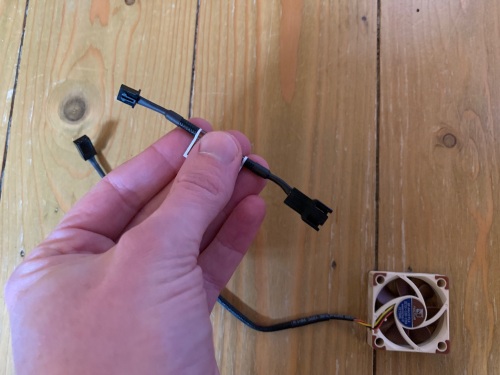
The third pin is a tachometer output from the fan, to tell the connected device how fast it’s spinning. The Swann DVR doesn’t use that, so it just needs the two power pins.
To fit the fan, you first need to remove the lid of the DVR unit. This is done by removing four cross-head screws towards the corners on the bottom of the unit and then lifting the plastic casing upwards. It will still be attached by some wires for the LEDs and USB ports on the front, so don’t yank it away.
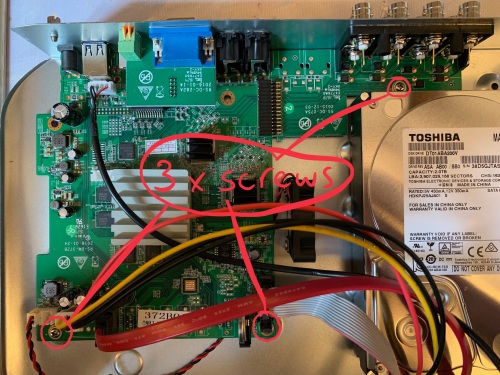
With the lid removed, you’ll see something like this:
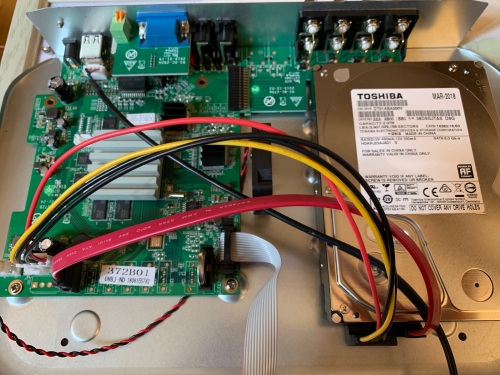
The fan is that black rectangle bit in the middle.
You’ll notice that the fan is held in place by two screws at the base of the fan.
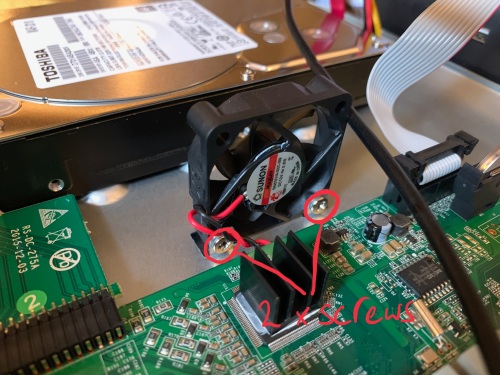
This is where things start to get annoying. You can’t unscrew the screws, because the main PCB of the DVR is in the way. I tried using a right-angle screwdriver, but no luck – the fan is too close to the PCB to get the screwdriver in.
The only way forward is to remove the entire main PCB, so here goes. From above, there are three screws holding the PCB in place. Remove those three screws, shown below.
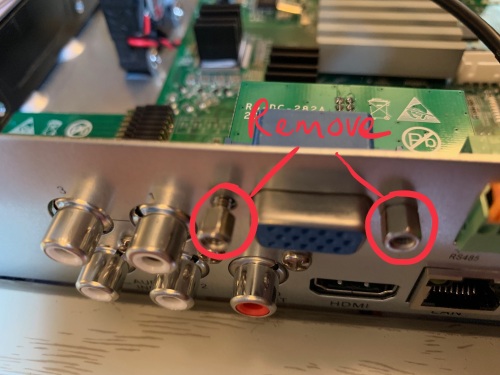
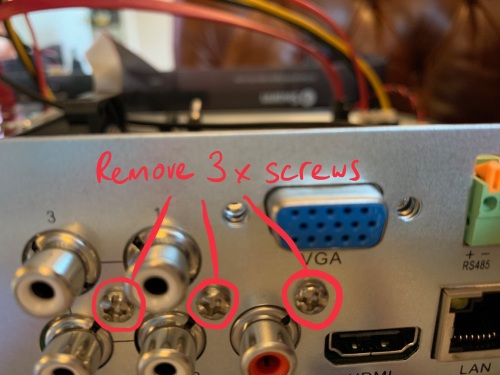
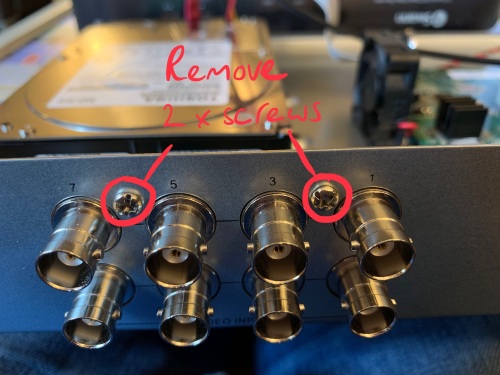
The board is additionally held in place by a number of screws on the rear face of the DVR. Remove each of the below screws, making a note of which type of screws came from where.
You should now be almost able to remove the main PCB, however you won’t be able to move it back far enough for the BNC connectors to go through their holes, as the hard disk will be in the way. Remove that, by unscrewing the four screws from the bottom of the DVR unit and you should now be able to carefully pull away the PCB. You’ll end up with a pretty bare looking plate of metal with just the fan on it.
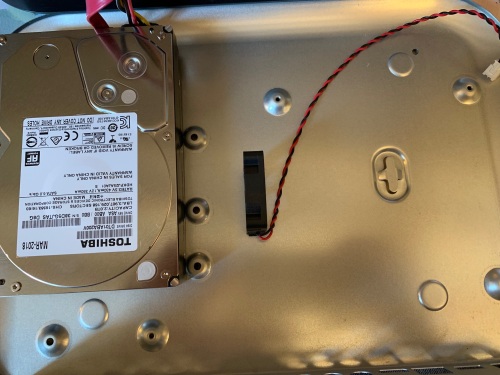
Now you’ll have all the clearance you need to unscrew those two pesky screws at the base of the fan. Remove the fan and un-clip its connector from the main PCB. Throw it away, burn it, or whatever you think it deserves.
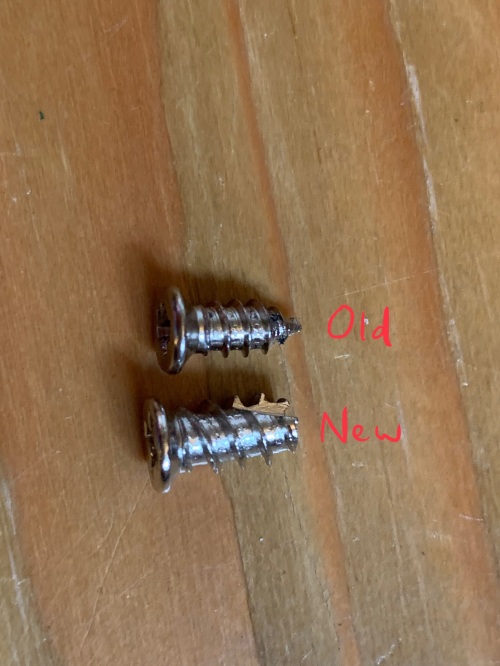
The screws for the Noctua fan are larger in diameter than the original fan’s. This is a problem, as they won’t go through the holes in the little metal flaps in the base unit that the fan screws onto.
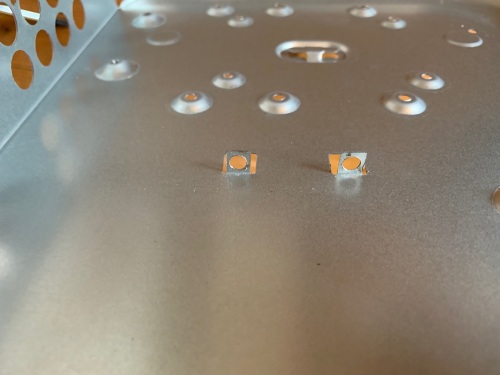
I bent the tabs back a bit and used a 5mm HSS drill bit to enlarge the holes, before bending them back to an upright position again. Clearly, this is going to void your warranty. I guess there are other options for mounting the fan, without drilling out the holes, for example you could attach it with cable ties looped through the metal tabs, or superglue it to the base. I went for the screws option, as the fan needs to be securely mounted, to avoid vibration and further annoying noises.
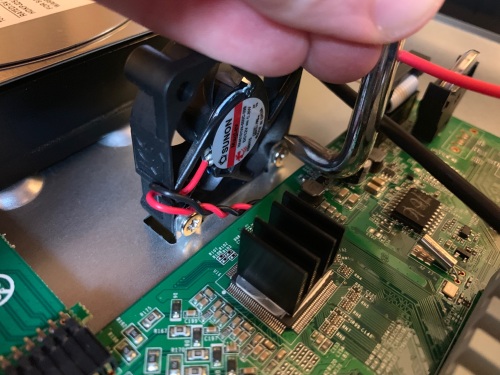
You can now screw the new Noctua fan into the metal flaps, using the screws provided in the box with the fan.
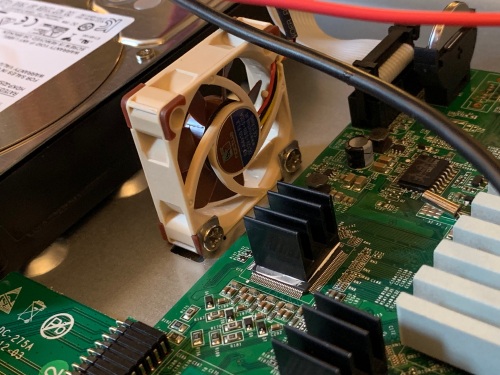
Pay attention to the orientation of the fan. The side with the sticker needs to face towards the main PCB, as shown above.
You can now re-fit the main PCB. Without wanting to sound too much like a Haynes manual, reassembly is the reverse of removal.
Once the main PCB is back in place, re-attach the hard disk.
Don’t forget to plug the fan into the PCB, using the 2-pin adapter that came with the fan.
With the lid still off the DVR, plug in the power adapter (be sensible here, don’t touch anything inside as you do so) and make sure the fan spins up. If it does, then you can put the lid back on and connect up all the cables. You’ll notice when it’s powered up again that it’s much quieter than before. You’re welcome. To demonstrate just how much quieter, here’s a dB meter reading taken from the same distance away from the DVR, following the installation of the new fan.
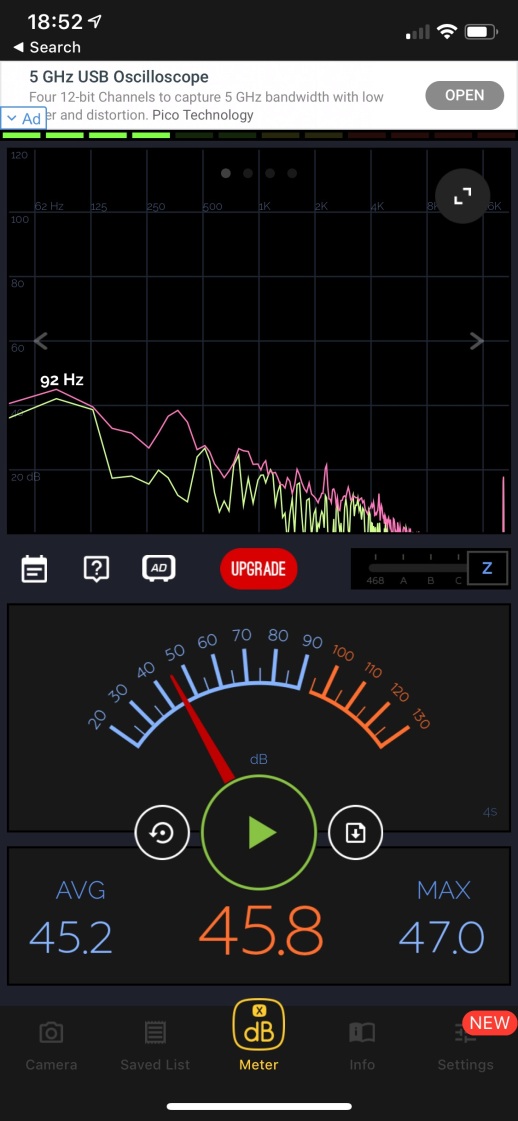
So the noise has gone from 74.3dB down to 45.8dB. Don’t read too much into the actual numbers, this was only a free dB meter app on my iPhone, but it’s pretty clear that the new fan has made a big difference. Remember that the dB scale is not linear, so that’s a significant decrease in noise.
The Noctua fan runs at slower RPM than the original fan, which is partly why it’s so much quieter. Because of that, I thought it might result in an increase in temperature of the unit. I checked before I started and the DVR was reporting an internal temperature of 31 degrees C. After changing the fan, I left it a couple of hours to warm up and checked the temperature. It had gone down to 28 degrees. So, not only is the new fan quieter, it also seems to perform better.
Root Cause
The root cause of the problem with noise from the DVR unit is the use of a cheap fan, which operates at too high a noise level. A better testing regime by Swann should have identified and fixed this before the product was launched.
Also, there is no thermistor control, so the fan is always on, at a constant speed, no matter what the internal temperature. They could have managed the cooling better and had the fan only kick in when the temperature rises above a threshold.
Swann could also have designed the internals of the unit a bit better. The DVR unit is arranged with perforated sides, taking cool air in the left side of the unit (when viewed from the front) and expelling hot air out of the right hand side. The fan is in the middle and draws in air, pulling air across the heat sinks on the main processor and other components. That’s all good, although there’s no baffling or anything to channel the air inside the unit. The fan then blows that warm air into the hard disk, which sits on the other side of the fan – not exactly ideal. The hard disk blocks the flow of air and due to the lack of baffling inside the unit, there’s nothing stopping that warm air from flowing around inside the unit, rather than being expelled out of the exit vent. We’re certainly not talking Apple levels of design here, but I guess it does the job.
One thing that particularly annoyed me about the design was the little metal tabs that the fan screws onto. I had to take the entire unit apart to remove the fan. If they’d just cut the tabs the opposite way, so they face the hard disk, all that would be required to remove the fan is to unscrew the hard disk and move it out of the way. I guess they never intended the unit to be messed around with by end users, but surely that simple change would have made life easier for Swann when fixing units under warranty too.
Other Stuff
The fan I used was a Noctua fan of the same dimensions as the original fan fitted by Swann (40 x 40 x 10mm). There is plenty of room where the fan is to fit a deeper fan, say one 20mm rather than 10mm deep. That would allow for a greater volume of air to be moved by the fan, which would allow it to run at a lower RPM and therefore be even quieter. The downside would be that the output side of the fan would be even closer to the hard disk and would have less room to escape around the disk, so it may increase turbulence inside the unit. If you decide to try a 20mm deep fan, please leave a note in the comments with your findings. I’d be interested to hear how it works noise-level wise and how it affects the internal temperate reported by the DVR.
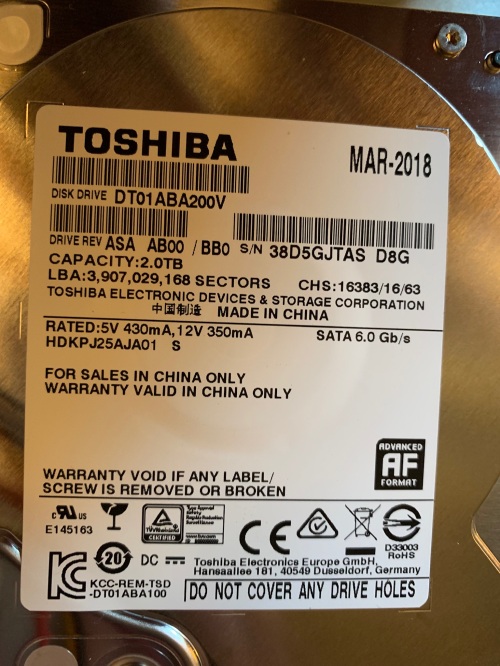
For those that may be interested in replacing the hard disk, below is a picture of the label showing the model and specs of the OEM unit.